
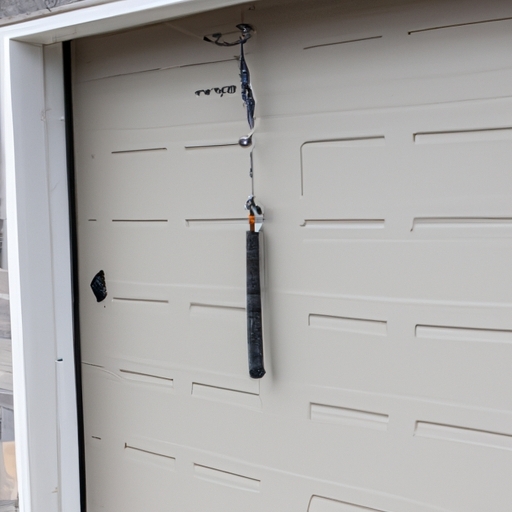
Understanding the signs of a broken or worn-out torsion spring is crucial for any homeowner. (Firstly), it allows you to identify potential problems early on and take necessary steps to avoid costly repairs. Additionally, being able to recognize these signs ensures the safety of you and your loved ones. So, without further ado, let's dive into this step-by-step guide for replacing a torsion spring!
One common sign that indicates a broken torsion spring is when your garage door suddenly becomes heavy and difficult to lift! (However), keep in mind that this could also be due to other issues such as damaged tracks or rollers. To confirm if the torsion spring is indeed the culprit, disconnect the automatic opener and try manually lifting the door. If it feels excessively heavy and doesn't stay open at different heights, chances are high that the torsion spring needs replacement.
Another sign of a worn-out torsion spring is when your garage door starts making strange noises during operation. These noises can range from squeaking, grinding, or even popping sounds! (Oh no!) This indicates that the springs are not able to support the weight of the door properly anymore. Ignoring these noises may lead to more severe damage or even complete failure of the springs!
A visible gap between the coils of your torsion spring is yet another telltale sign of wear and tear! (Nevertheless), do not attempt to touch or adjust these springs yourself as they are under high tension and can cause serious injury if mishandled. Instead, consult with a professional technician who has experience in replacing garage door components.
To replace a broken or worn-out torsion spring, it is essential to follow proper safety measures! (In conclusion), always ensure you have protective eyewear and gloves before starting any work on your garage door system! Remember never to attempt replacing a torsion spring alone unless you have proper knowledge and expertise in doing so!
By understanding these signs and following the necessary steps, you can successfully replace a torsion spring and ensure the smooth operation of your garage door. So (on the whole), take care of those springs, dear homeowners, and enjoy a hassle-free garage door experience!
When it comes to replacing a torsion spring, gathering the necessary tools and safety equipment is crucial. It ensures (that) the process goes smoothly and (is) done without any accidents or injuries. (To start), you will need a few essential items: a winding bar, vice grips, safety goggles, gloves, and a ladder.
Firstly,(uhm) it's important to mention that ensuring your own safety should be your top priority (!). Before starting the replacement process, put on your safety goggles and gloves. These protective gear will shield your eyes from any debris or flying particles (!), while also preventing any potential cuts or bruises on your hands.
Next,(well) let's move on to the tools you'll need for this task. The winding bar is used to apply tension to the torsion spring during installation. Without it, you won't be able to properly wind or unwind the spring! Be sure to choose a winding bar that matches the size of your torsion spring - using an incorrect size could lead to serious injuries.
Now,(oh gosh) let's not forget about the vice grips! These handy tools are used to secure the winding cone in place while working with the torsion spring. By tightly gripping the cone, you can prevent it from turning unexpectedly (!), which could cause accidents or damage.
Lastly,(by golly) having a sturdy ladder is essential for reaching and accessing the garage door system safely. Make sure it's tall enough so that you can comfortably reach all areas(!). A wobbly or unstable ladder can result in falls or other mishaps!
In conclusion,(you know) replacing a torsion spring requires proper preparation with gathering all the necessary tools and safety equipment(!). Safety goggles, gloves, winding bars, vice grips (!), and a stable ladder are all indispensable elements needed for this task. Neglecting these essentials may lead (to) severe injuries or damage. So, follow this step-by-step guide carefully and get ready to replace that torsion spring safely (!).
When it comes to replacing a torsion spring, safety should be the utmost priority. (Seriously), before diving into the process, it is crucial to ensure that proper safety measures are in place. This step is essential (like, really essential) as working with torsion springs can be extremely dangerous if not done correctly.
To begin with, make sure to wear protective gear such as goggles and gloves. (Believe me,) these may seem like small precautions but they can prevent serious injuries! Additionally, it is important to secure the area where you will be working by removing any potential hazards or obstacles.
Next, take the time to familiarize yourself with the specific instructions provided by the manufacturer for replacing the torsion spring. (By all means,) do not skip this step as each torsion spring installation may have unique requirements. Following these guidelines accurately will help avoid any mistakes or accidents during the replacement process.
Before proceeding further, (to be honest) it is wise to inspect the condition of your tools and equipment. Ensure that they are in good working order and free from damage or defects. Using faulty tools can lead to mishaps and compromise your safety while handling torsion springs.
Now that you have completed these preliminary steps, it is time to move on to actually replacing the torsion spring. Remember (no doubt about it), always work slowly and cautiously throughout this process. Rushing or being careless could result in severe injuries or property damage!
In conclusion, ensuring proper safety measures before starting the replacement of a torsion spring is of utmost importance! By taking necessary precautions, wearing protective gear, following manufacturer's instructions precisely, inspecting tools beforehand, and working deliberately throughout the procedure; you can minimize risks and successfully replace a torsion spring without any hiccups!
Step 2: Releasing tension from the old torsion spring can be a tad tricky, so pay close attention to avoid any mishaps (trust me, you don't wanna mess this up)! First things first, let's talk safety. Before tackling this step, make sure you've got your protective gear on (gloves and goggles are a must). Now that we've covered that, let's move on.
To begin with, locate the winding cone on the torsion spring (the thingamajig that looks like a screw). Grab your winding bars (these nifty tools will help you release the tension) and insert them into the holes on each side of the cone. It's important to note that these bars should fit snugly in place; otherwise, they could slip and cause some serious damage.
Once you've got your bars securely in place, turn them counterclockwise to loosen the tension. Keep in mind that it may take some elbow grease to get things moving. As you turn, feel for any resistance or give from the spring. If it feels too tight or refuses to budge, stop immediately and seek professional assistance.
Now here comes an essential part: removing tension from the torsion spring safely! While maintaining pressure on one bar with your non-dominant hand (so it doesn't spin back atcha), use your other hand to slowly remove the set screws securing the winding cone. Don't rush this step; take it slow and steady!
Once all screws are loosened, carefully unwind the torsion spring by turning the winding bars away from each other. Remember to maintain control throughout this process as sudden releases of tension can lead to dangerous situations! Slowly but surely is our motto here.
Alrighty then! We've successfully released tension from our old torsion spring without causing any major calamities (pat yourself on the back for a job well done)! Now we can move on to the next step in our torsion spring replacement adventure. So, grab a breather and get ready for what's coming up!
Replacing a torsion spring can be a daunting task (especially for those without prior experience)! However, with the right tools and proper guidance, it is definitely achievable. In this step-by-step guide, we will walk you through the process of removing the old torsion spring and preparing for the installation of a new one.
Now let's dive into Step 3: Removing the old torsion spring! This is a crucial part of the process as it sets the stage for installing a brand-new spring. First things first, ensure that you have all the necessary safety gear on hand (such as gloves and goggles) to protect yourself from any potential injuries.
To begin, locate the winding cone at one end of the torsion shaft. Carefully insert your winding bars into the holes on either side of the cone, making sure they are securely in place. Now here comes an important note: make sure to hold onto both winding bars tightly (to avoid slippage) while loosening or tightening any components!
Next, using an adjustable wrench or socket set, loosen and remove all bolts securing the stationary cones to their respective brackets. Take extra caution during this step as these bolts might be under tension (which could cause them to fly off if not handled properly). Remember safety first!
Once all bolts are removed, carefully slide off each stationary cone from its bracket. Keep in mind that these cones can be quite heavy, so take your time and ask for assistance if needed. After successfully removing them, set them aside in a safe place away from any potential hazards.
Transition phrase: Moving on to our next crucial step - preparing for installation of a new torsion spring! Before proceeding further, take a moment to inspect both ends of your torsion shaft. Check for any signs of wear or damage that may indicate replacement is necessary (better safe than sorry!).
Now that you have assessed your torsion shaft's condition and confirmed its suitability for a new spring, it's time to move forward. Start by cleaning the shaft thoroughly using a rag or brush to remove any dirt, debris, or old lubricant residue. This step ensures optimal performance and longevity of your new torsion spring.
Once the shaft is clean and dry, you can now proceed with attaching the stationary cones back onto their respective brackets. Make sure they are securely fastened but not overly tightened (as this can cause unnecessary strain on the components). Pay attention to every detail during reattachment!
Congratulations on completing Step 3! You have successfully removed the old torsion spring and prepared for the installation of a new one. The next step in our guide will cover how to safely install this vital component while ensuring smooth operation of your garage door (exciting stuff!).
Remember, patience and attention to detail are key throughout this process. Stay focused, follow each step diligently, and don't hesitate to seek professional assistance if needed. With determination and proper guidance, you'll soon have a fully functional torsion spring in place - ready to provide reliable support for your garage door!
Step 4: Installing the new torsion spring and adjusting its tension is a crucial (but sometimes overlooked) aspect of replacing a torsion spring. Once you have safely removed the old spring, it's time to move on to this next step. First, be sure to select an appropriate replacement spring (never underestimate its importance!). Then, carefully position the new spring onto the torsion tube using the necessary tools.
Now comes the fun part (or not): adjusting the tension of the new torsion spring! This is where things can get a bit tricky. You'll need to use winding bars and apply just the right amount of force to achieve proper balance. It's important (believe me!) to exercise caution during this process as mishandling can lead to serious injuries or damage.
To begin, insert one winding bar into a hole near the bottom of the cone while securely holding onto another bar with a vice grip. Slowly unwind (not wind!) any remaining tension from both sides of the old spring using cautious movements. Remember, safety should always be your top priority!
Once all tension has been released (!), remove any remaining hardware from your old spring and set it aside for disposal. Take a moment to inspect your garage door tracks for any signs of wear or damage; if needed, make necessary repairs before proceeding further.
At last, you're ready for installation! Slide one end of your new torsion spring onto the stationary cone and secure it tightly with set screws – don't forget those! Next, attach cables and pulleys according to manufacturer instructions while ensuring they are properly aligned within their respective grooves.
And voila! You've successfully installed and adjusted your new torsion spring like a pro (hopefully)! Now take some time to test your garage door's functionality by carefully raising and lowering it several times. If everything runs smoothly without any hiccups or strange noises (!), then give yourself a pat on the back – you deserve it!
In conclusion, installing and adjusting a new torsion spring might sound daunting, (well, it actually is!) but with proper guidance and caution, you can accomplish this task successfully. Remember to prioritize safety at all times and follow each step carefully. Good luck with your garage door repair journey!
Final Steps and Precautions for a Successful Garage Door Spring Replacement
Replacing a torsion spring on your garage door can be a daunting task, but with careful attention to detail and following the step-by-step guide (which I'm sure you've been eagerly awaiting!), you can successfully complete the job. However, before you celebrate prematurely, it's important to consider the final steps and precautions that will help ensure a safe and efficient replacement process.
Once you have installed the new torsion spring, it is crucial to perform a thorough inspection of all other components (like wobbly or loose parts) in order to identify any potential issues. Neglecting this step may lead to future complications (heaven forbid!). Additionally, double-check that all bolts and screws are securely tightened - you don't want any unexpected surprises when operating your garage door!
Now that everything seems in order, take a moment to test the functionality of your newly replaced torsion spring. Open and close the garage door several times (carefully avoiding injuries!) to verify smooth operation. If you notice any strange noises or resistance during this test, stop immediately! It could indicate a problem that needs further attention.
Transition phrase: Moving forward,
Once you're satisfied with how your garage door functions post-spring replacement, implement some preventive measures for long-term maintenance. Apply lubrication (spray or oil) on all moving parts periodically to keep them running smoothly. Regular inspections are also advisable to catch any signs of wear or damage early on.
Finally, never forget about safety precautions! Always wear protective gear such as safety goggles and gloves while working on your garage door. Never attempt repairs alone; having an extra pair of hands can make the task less risky.
In conclusion (aahh), by following these final steps and taking necessary precautions during a garage door spring replacement, you'll be well on your way to enjoying hassle-free operation of your garage door. So, take a deep breath, put on your DIY hat, and get ready to conquer this project (with a touch of caution) like a pro!
The inconsistent performance of the garage door can be quite frustrating (, you know)!. Sometimes it works just fine, opening and closing smoothly.

Posted by on 2024-02-02
When it comes to garage doors, there are various types of springs that can be used for their operation.. Each type has its own set of advantages and disadvantages!
Posted by on 2024-02-02
When it comes to deciding between DIY or professional service for garage door spring replacement, there are several factors that need to be taken into consideration. (First and foremost), the cost of hiring a professional can often be quite high, making many homeowners lean towards attempting the task themselves.. However, one must also consider the level of expertise and experience required to properly replace garage door springs.
Posted by on 2024-02-02